
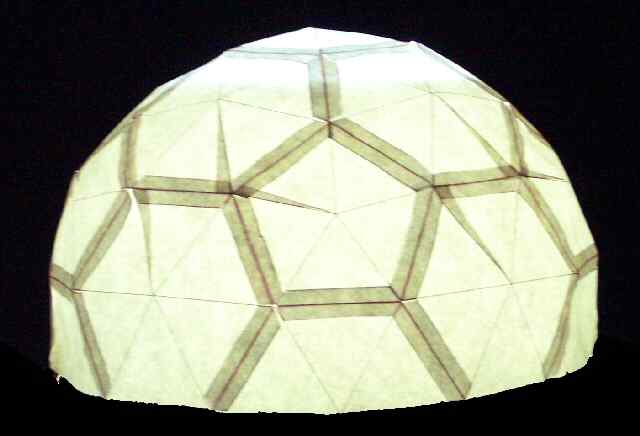
The model that you can build with these directions is just that - a model for a larger dome. These same directions could be adapted to build a full sized geodesic with the right materials, such as sheet steel or aluminum, or possibly thin plywood or even corfam. For an even larger dome make the individual triangles (with appropriate tabs).
You often hear that geodesic domes are complicated and require a lot of math on your part. Not necessarily true!
In a three frequency dome there are three lengths of struts (the sides of the triangles) and two types of triangles. For a more detailed explanation of chord factors and strut lengths see building a geodesic frame.
In this case all the hard work has been done for you, and all you have to do is cut out some parts and glue them together.
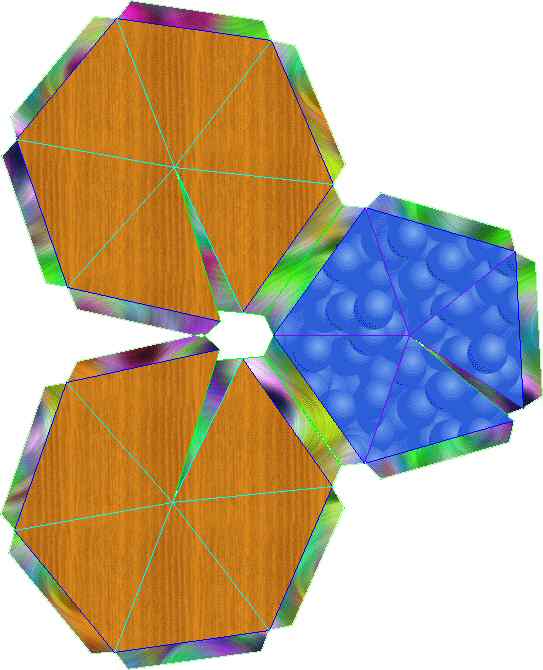
First you'll need a pattern. Either right click on the pattern link and save it, or just click to open the pattern in your browser. An alternative filled pattern is available if you'd like a fancier model, or you can open the plain pattern in a graphic program and do your own graphics or color fills, being careful to not alter the proportions of the pattern.
For this dome you need five half hexes, ten hexes, and six pents. Since the pattern has two hexes and one pent, print seven copies of the pattern, making sure they are the same size. If you print the pattern as large as most printers can on 8 1/2 x 11 paper you'll get a dome that is about 10" in diameter and 6" tall. Domes often lend themselves to assembly line type construction, because many identical parts are involved. When building "real" domes, a simple jig can be set up so that all identical parts can be mass produced with one jig setup. If you were making this dome out of sheet metal, stacking up sheets to cut all of the same shape at once would make fast work of cutting out all the parts.
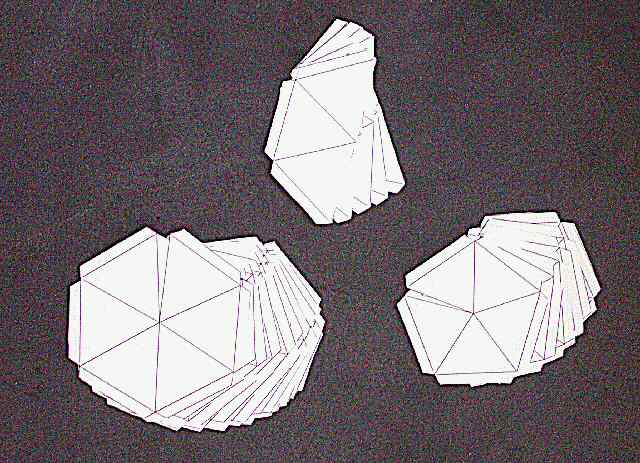
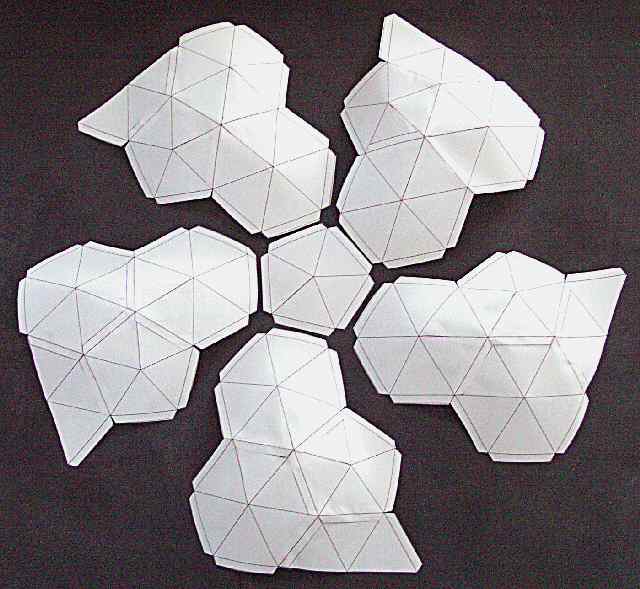
If your printer is accurate enough you can stack the seven sheets of pattern and cut them all at once with a ruler and razor knife. If you're klutzy and are going to cut yourself, please use blunt scissors to cut out your parts. Razor knife cuts can be deep and dangerous! Cut out all the hexes and pents on the green lines, cut three of the hexes in half, and you'll have parts like these. Be sure to leave all the tabs on the hexes and pents since they are used for assembly. You'll notice a small wedge shaped tab going to the center of each hex and pent. This tab should be cut on one side only (the green line) so that it can be used to join the triangles in the hex or pent.
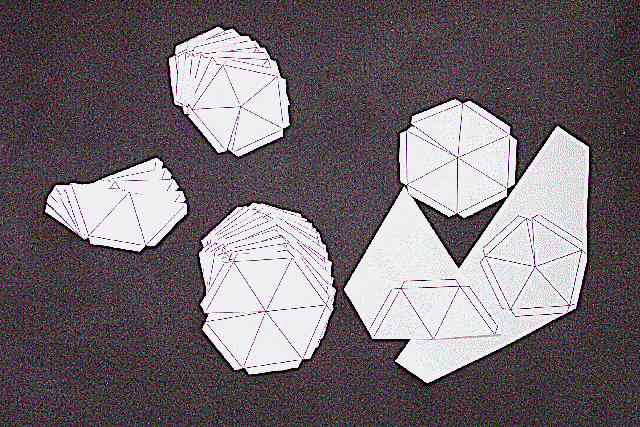
The three parts on the right are extras, not needed. If you prefer you can just print six copies of the pattern and make one half hex by tracing onto scrap paper. This would save a sheet of paper and a little ink.
These parts can be discarded or set aside for another project.
At this point you can decide if you want to crease the edges of all the triangles in the hexes and pents. If you do crease all the lines the dome will have a sharper profile. For purposes of assembly of the model, creasing or not creasing makes little difference.
After you crease all the lines, if you have decided to, then glue the wedge shaped tab on each hex and pent so that it is behind the adjacent triangle, making the hex or pent raised in the center, like a short cone - or pyramid like shape if you creased the lines.
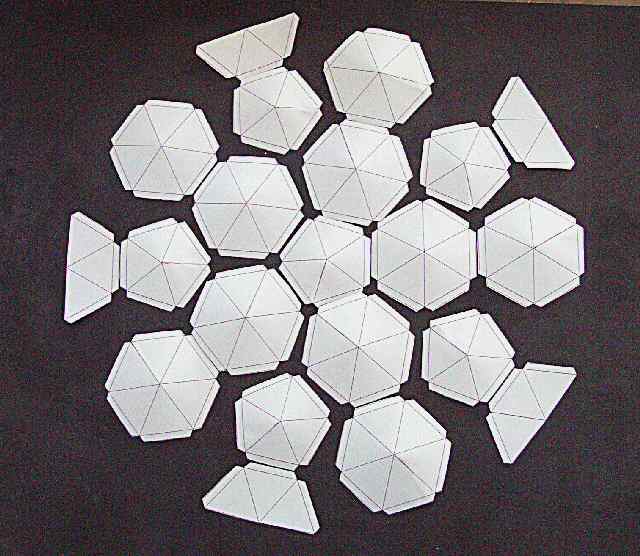
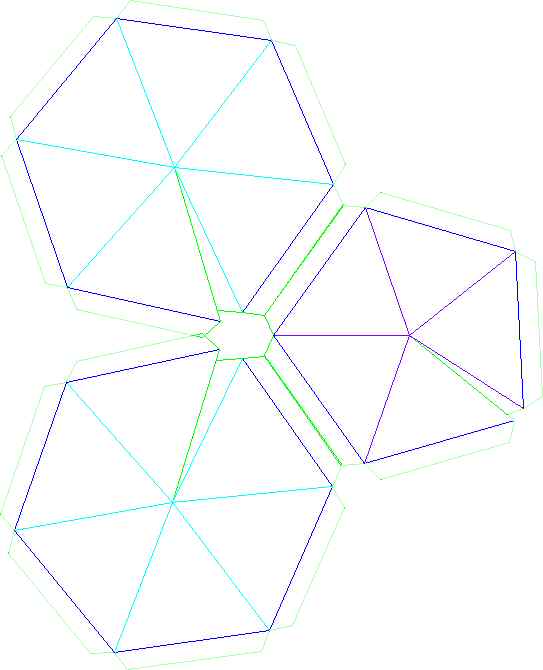
You'll end up with all the above pieces, which are laid out in the relative positions they will have in the completed dome.
The quick and easy to understand way of assembling this dome starts with making the ten hexes into five double hex modules. This is done by spreading glue on the outside of one tab, and on the inside of a tab on another hex, and overlapping the tabs so that the hexes are joined as shown below. With the idea of a possible full sized dome that we would want to be waterproof, we will pay careful attention and make sure that any overlaps are shingled so that the outside tab points down.
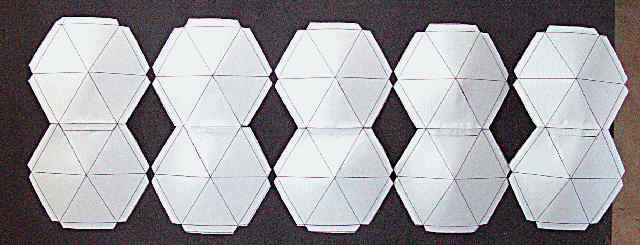
At this point any of the modules can be turned over, so the shingling is not yet a big concern. As you add parts to each module pay attention to the shingling.
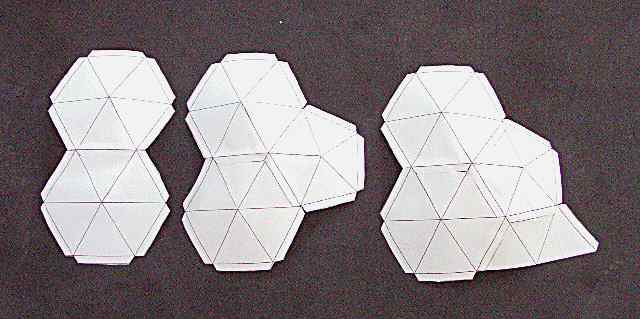
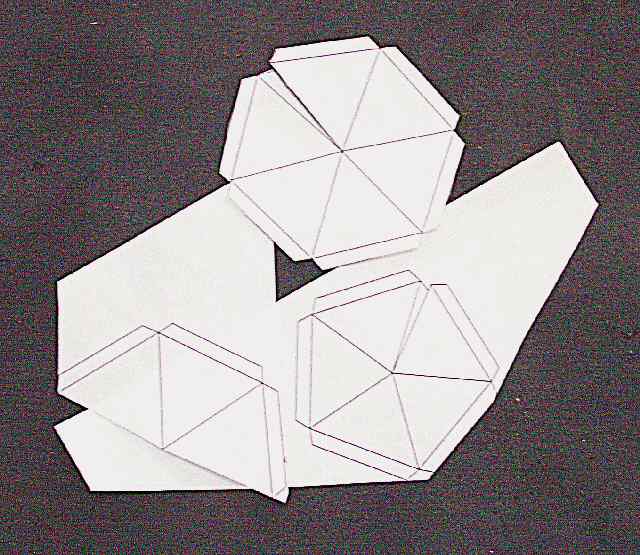
This step is repeated for each of the five modules. Glue a pent to the side between the two hexes, overlapping the tabs as before. Then add a half hex between the bottom of the pent and the side of the bottom hex. You'll have five of these modules when you are done with this step, along with the sixth pent.
As you can see, this is the same pattern as laid out above, with a lot fewer loose pieces. Glue each of the five modules to the top pent, making sure the pent tabs overlap on the outside.
Now all that is left to do is to work your way down each seam, gluing tabs from the pent on down until the dome is complete.
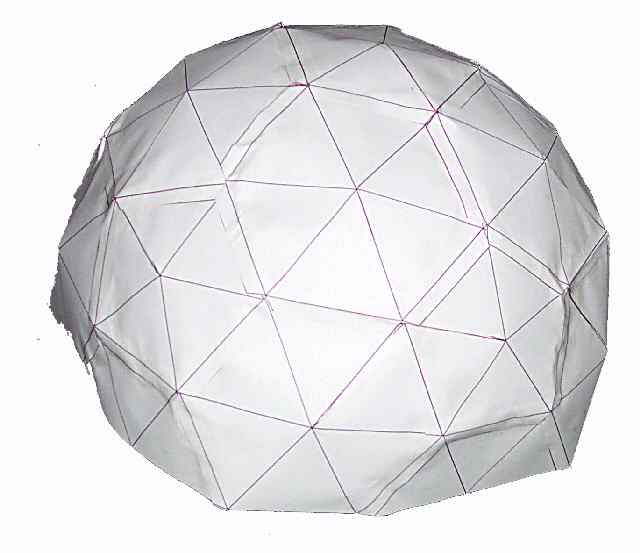
In the following picture you can see the overlap of the tabs, though the shingling direction might not be apparent.
Just make sure all outside tabs point down and you'll eliminate most of the possible leaks. Note that there are five seams that are vertical and so the shingling will not be as effective on those seams. A bead of some sort of sealant would probably be good here.
![]()